Materials and overall costs
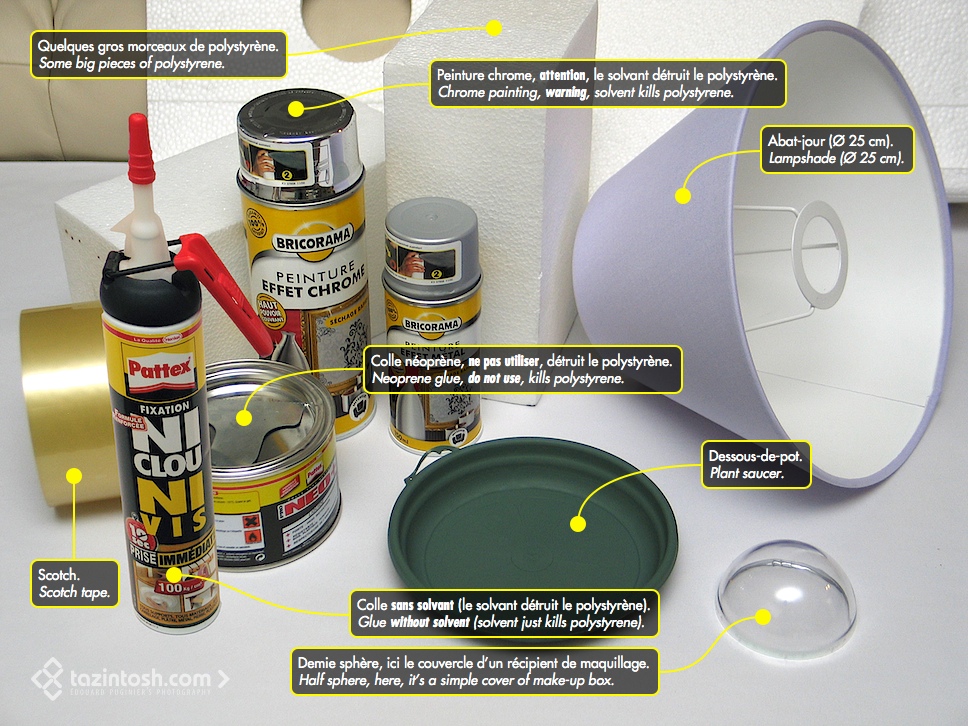
- Lampshade (Ø 25 cm): ≈ 10 €;
- The half sphere from the make-up box I'm using. (Hopefully, the make-up is not lost ^^): ≈ 12 € in promotion (otherwise 24 €);
- Saucer: ≈ 0,7 €;
- Half rigid plastic sheet to diffuse: ≈ 5 €;
- Chrome painting: ≈ 10 €;
- Glue: ≈ 15 €;
- Scotch: ≈ ?;
- Polystyrene: ≈ ?
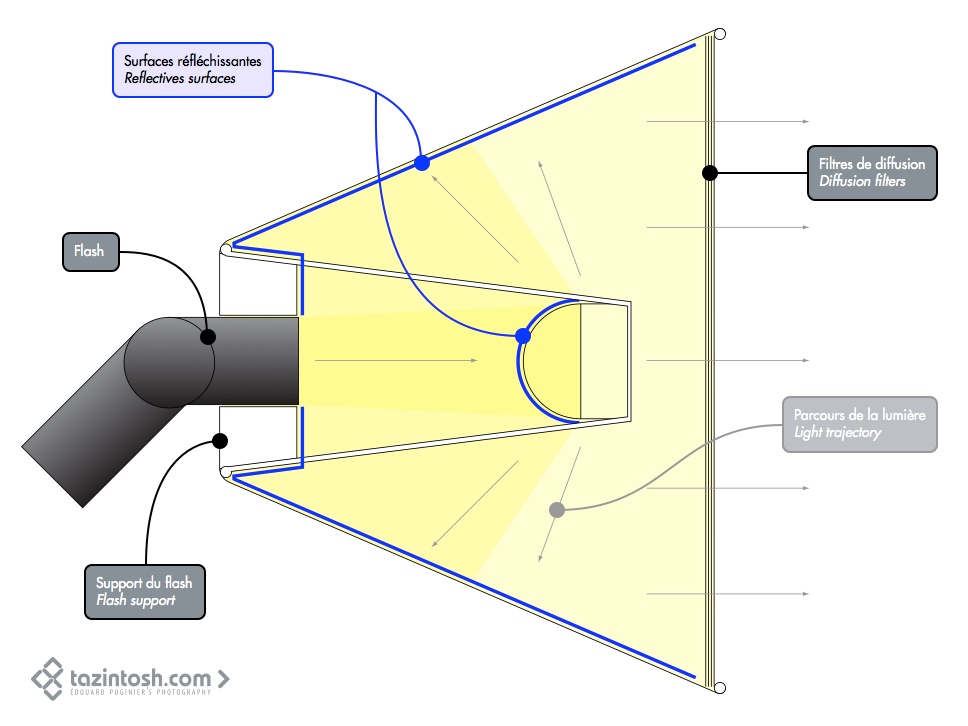
Simple working figure
What you need
Lampshades All-Purpose Glue Scotch Tan Color
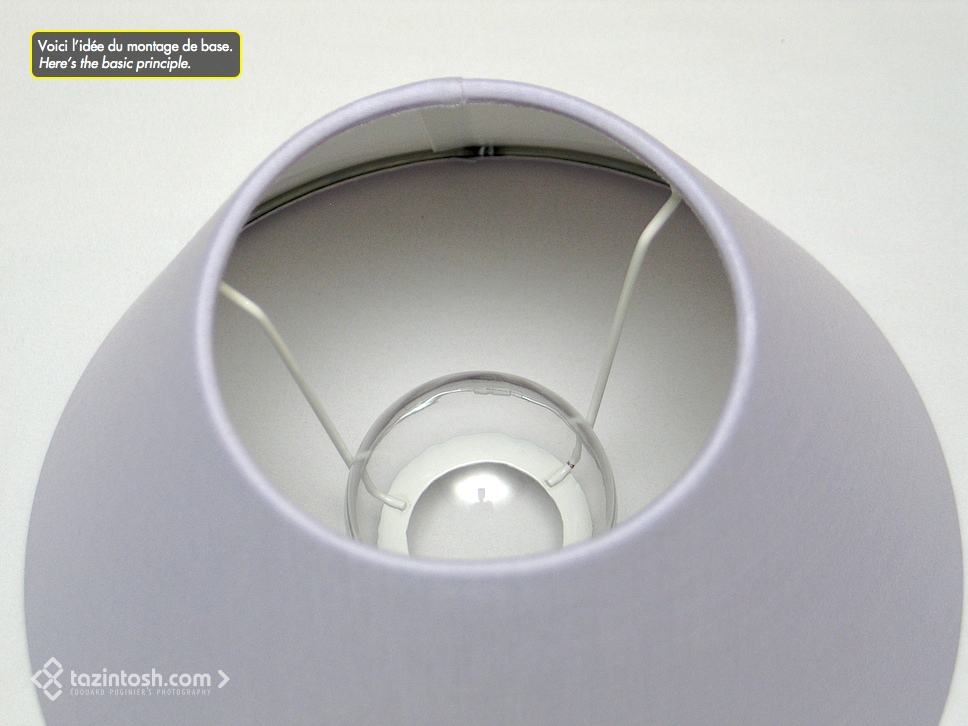
Basic principle
The main reflector
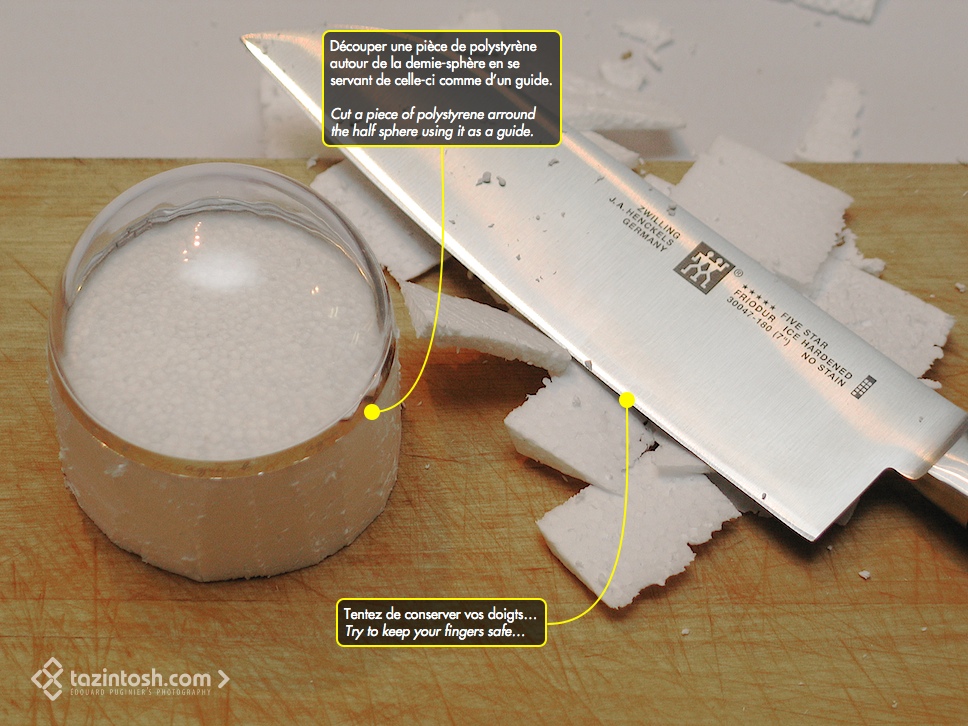
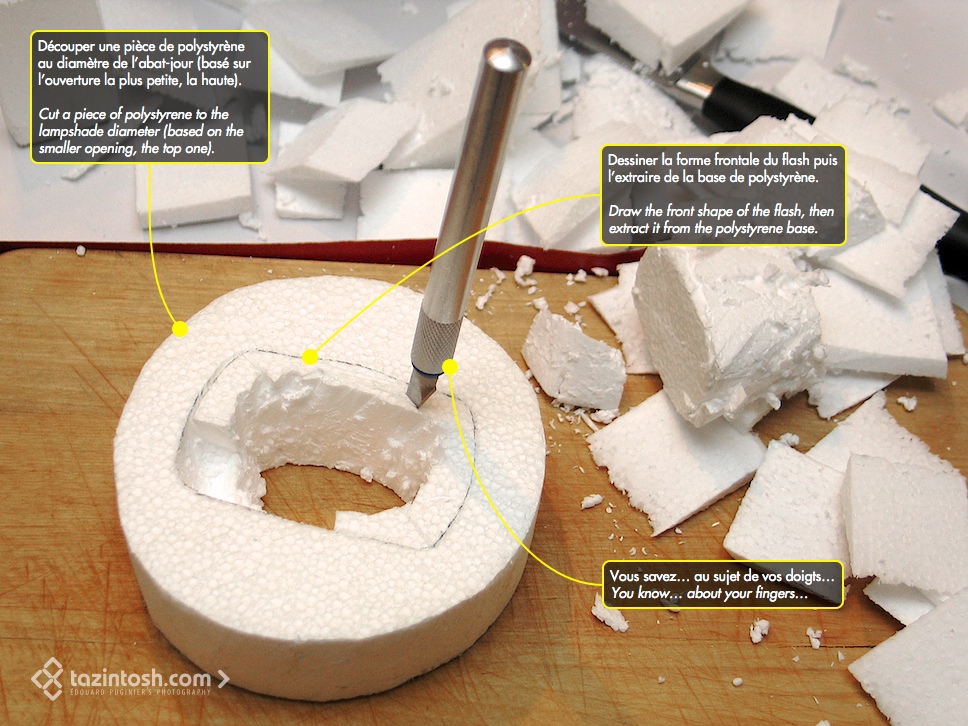
Cutting the flash support
Mounting the flash support
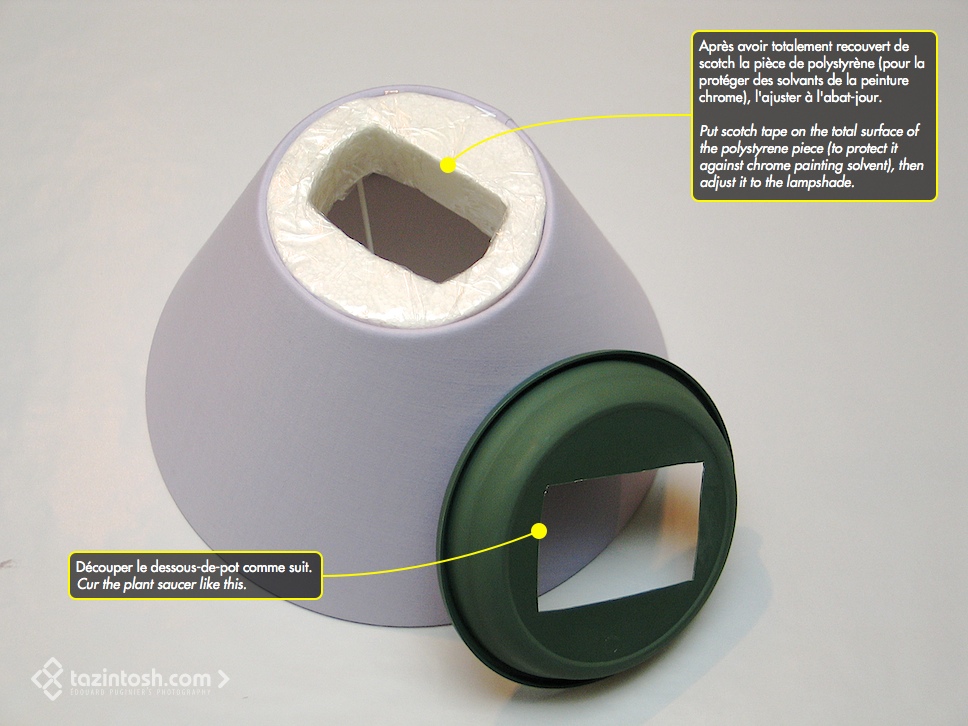
Mounting the flash support
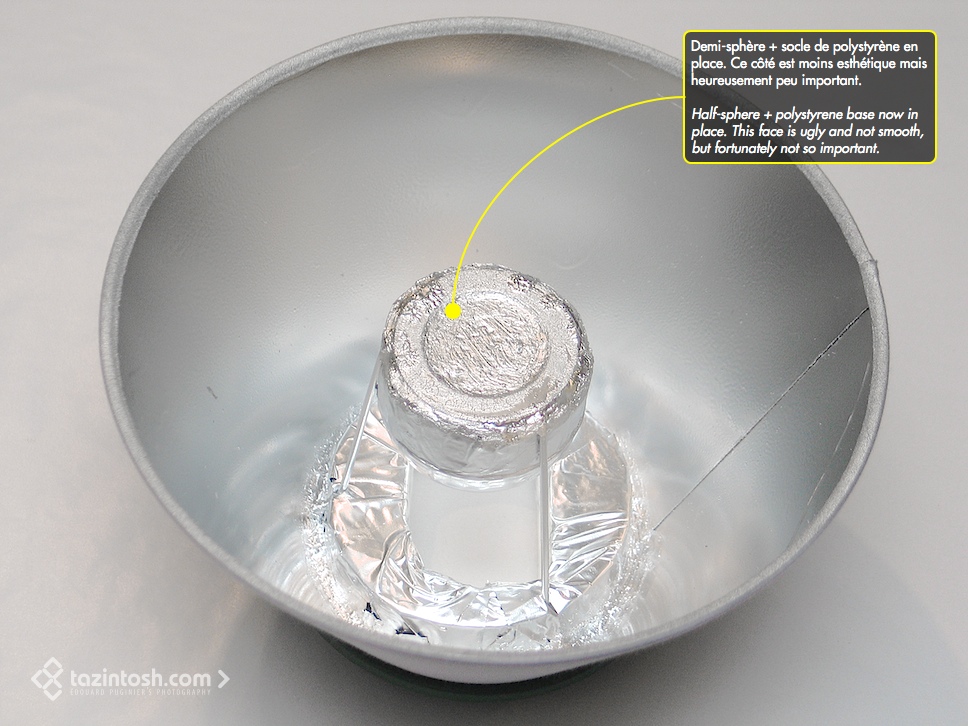
Flash support: inside view
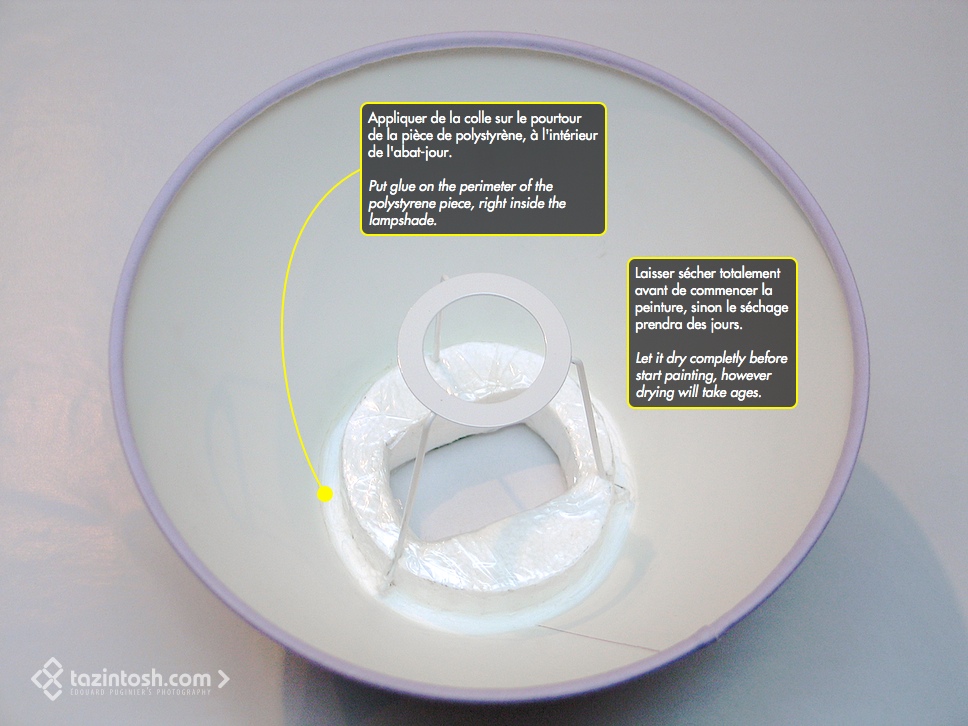
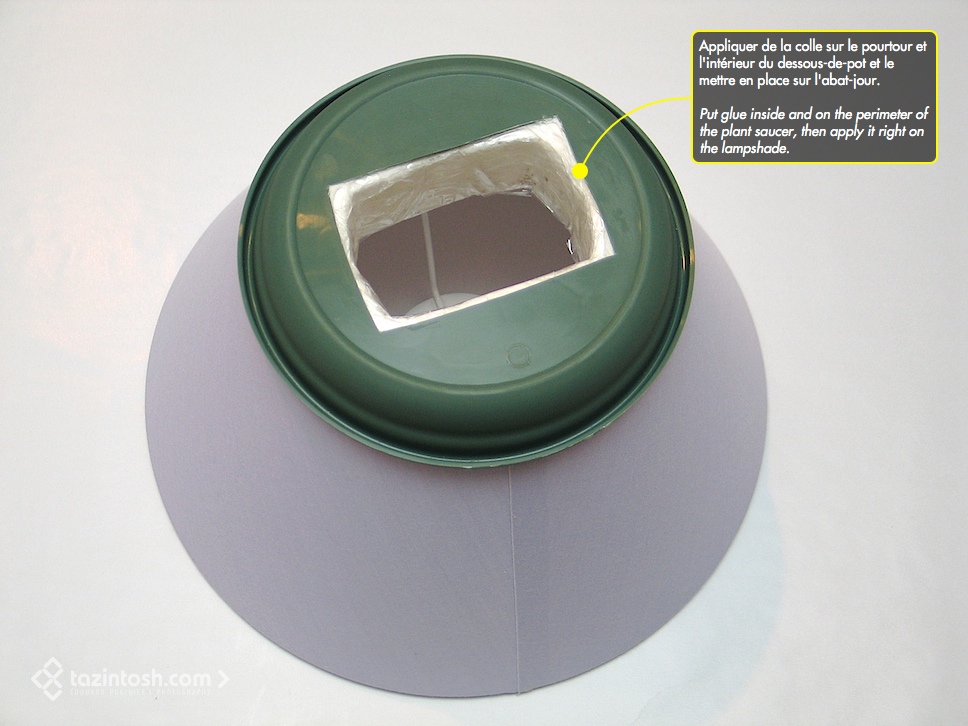
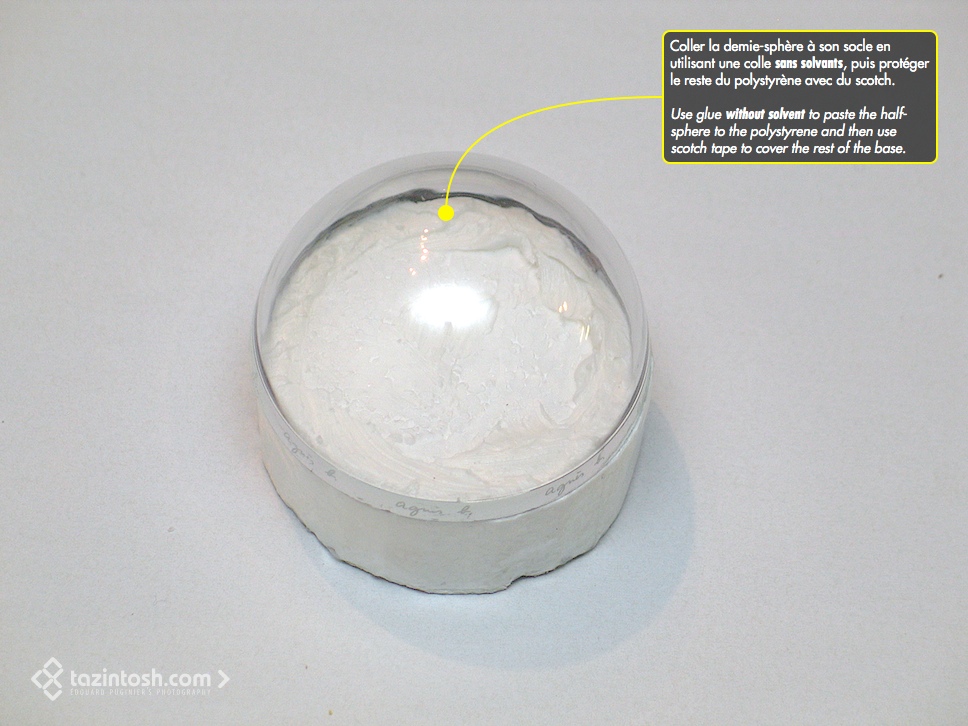
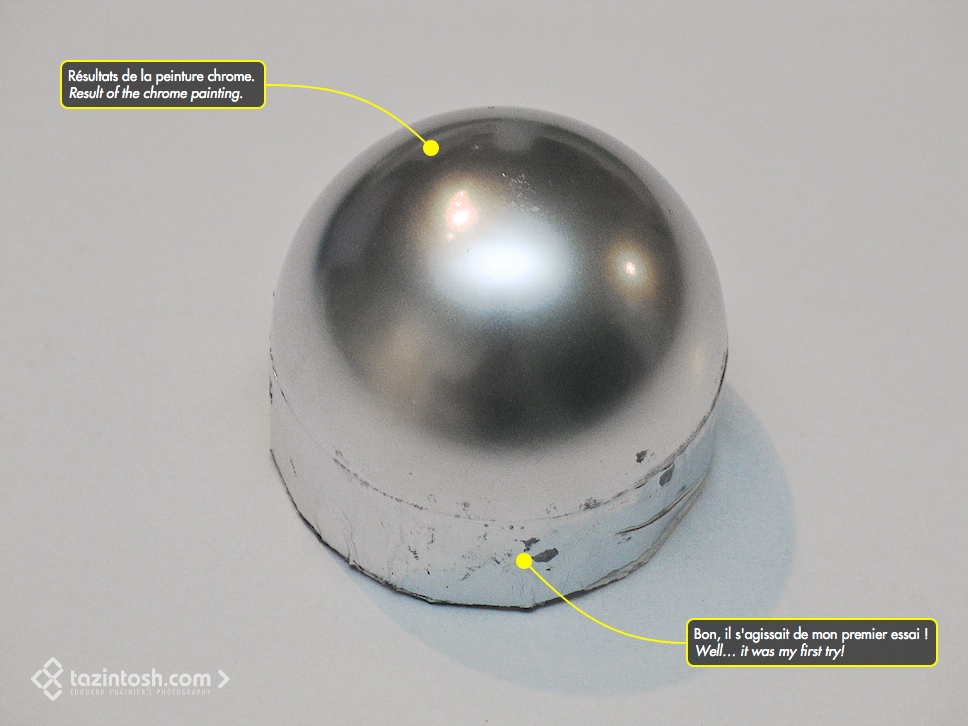
Gluing the reflector on his base
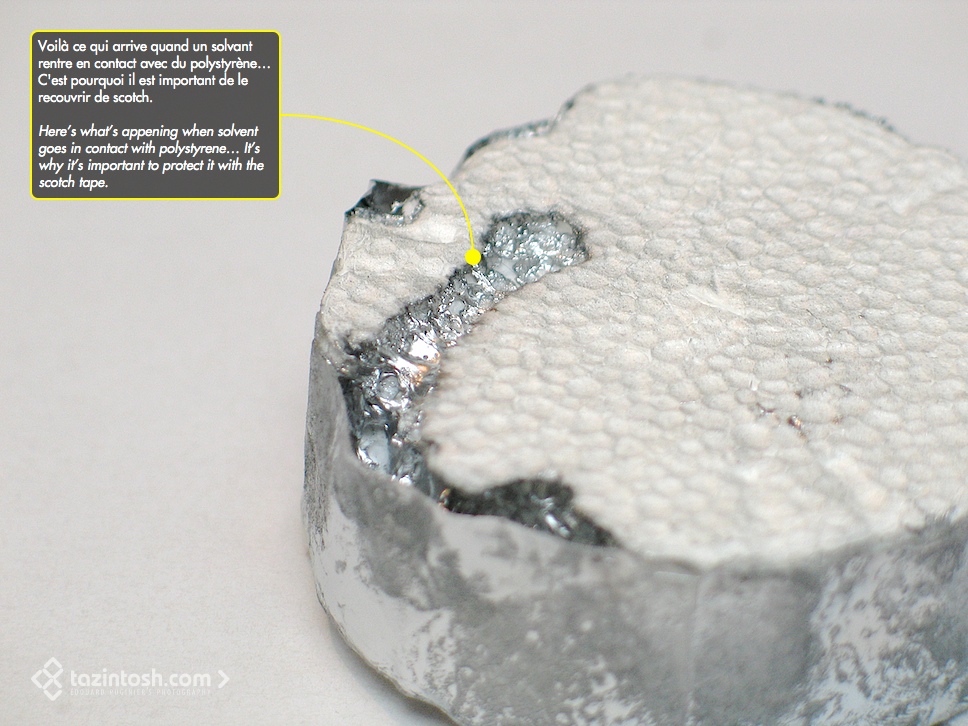
Watch out with the painting!
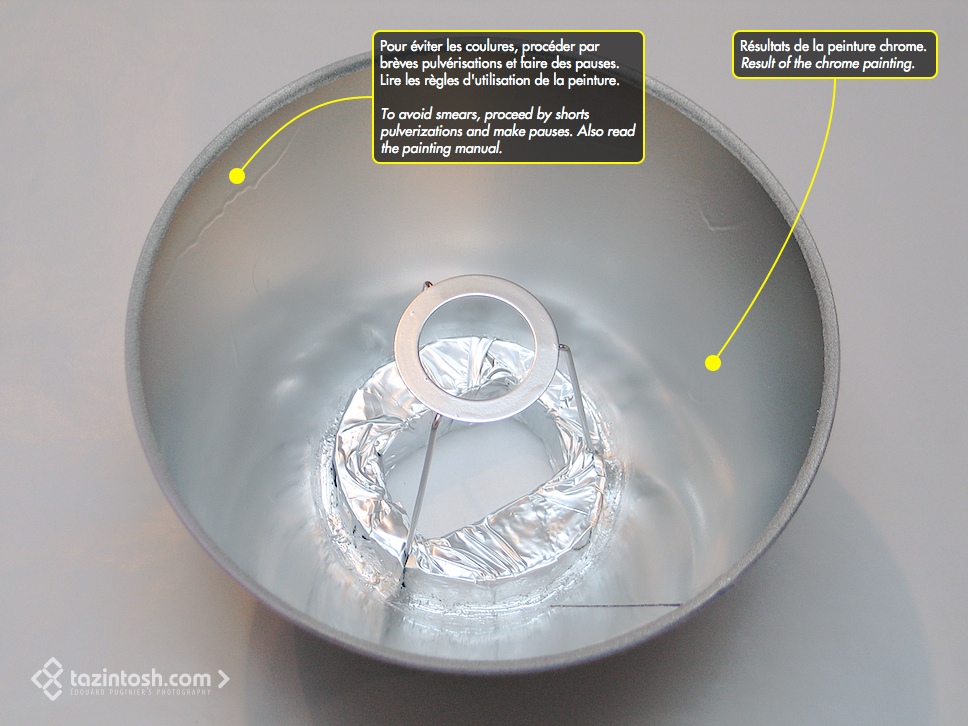
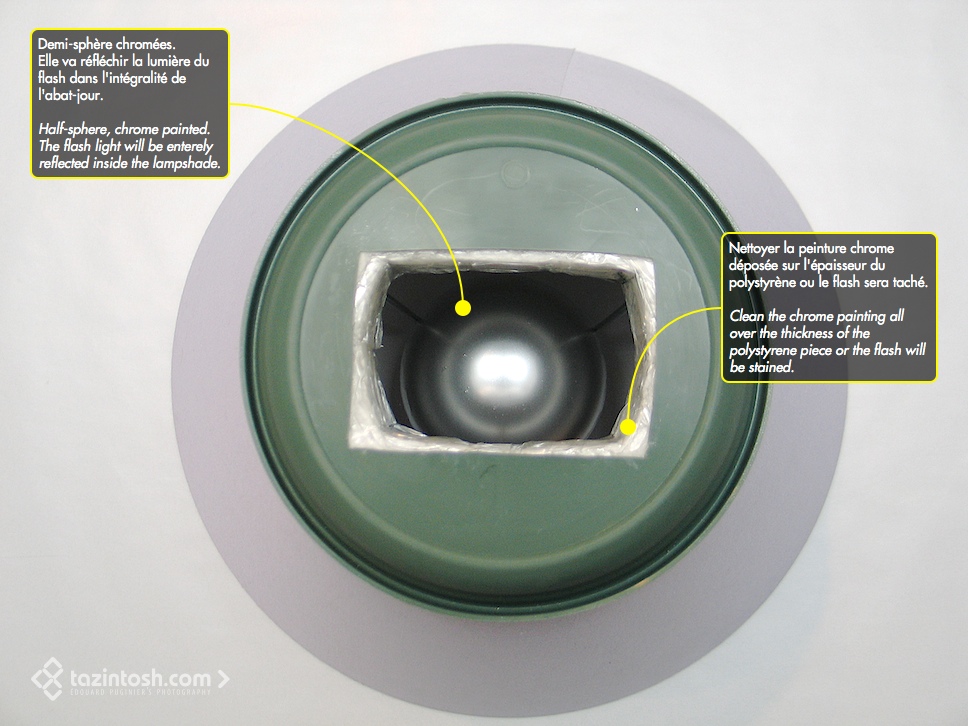
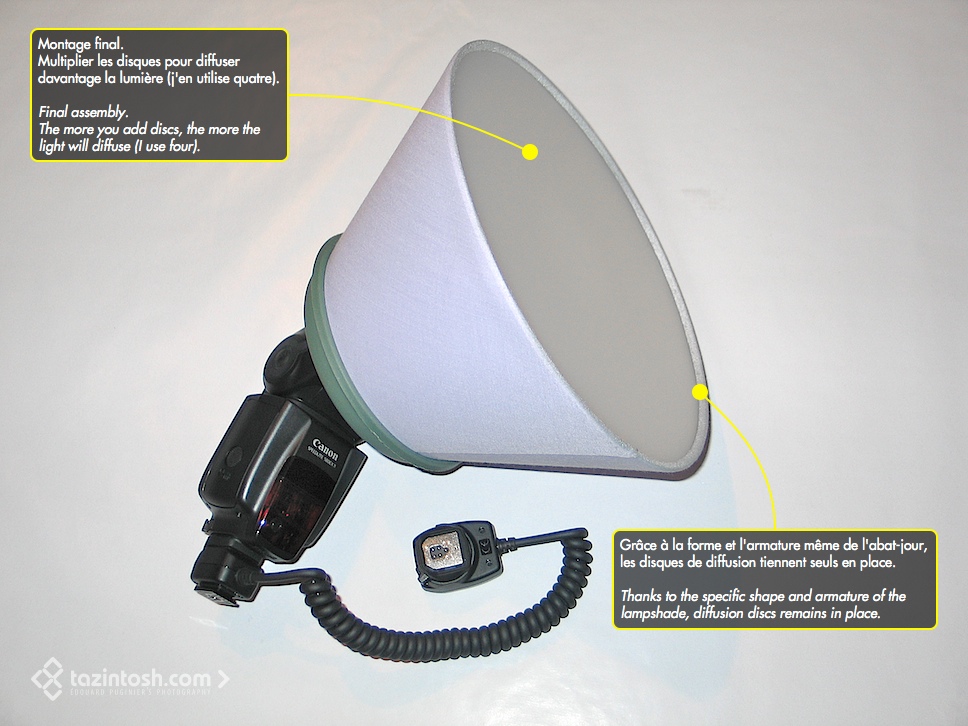
When the lamshade becomes a reflector
When half sphere becomes reflector
Reflector in reflector
Diffuse the diffuser
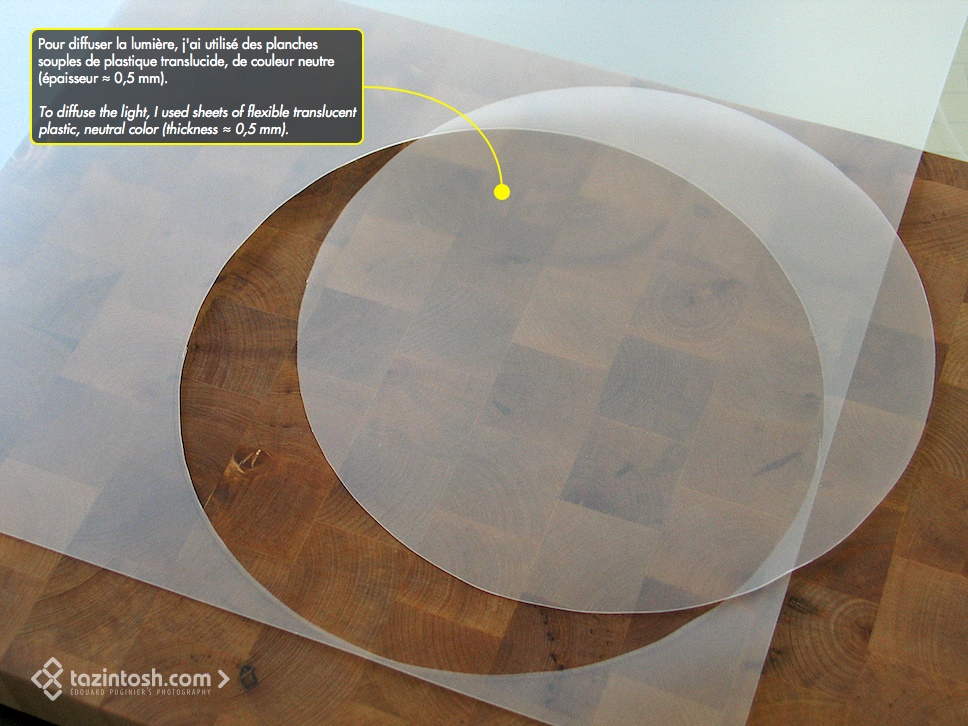
Top view
On place diffuser
A great thing: thanks to the simple assembly system of the "diffusion discs", it's easy to add colored ones (i.e.: a whole monochrome, muliple colors, half blue, half red, etc.). Does it work? Here's a little test with and without diffuser. Clearly fastly and badly realized.
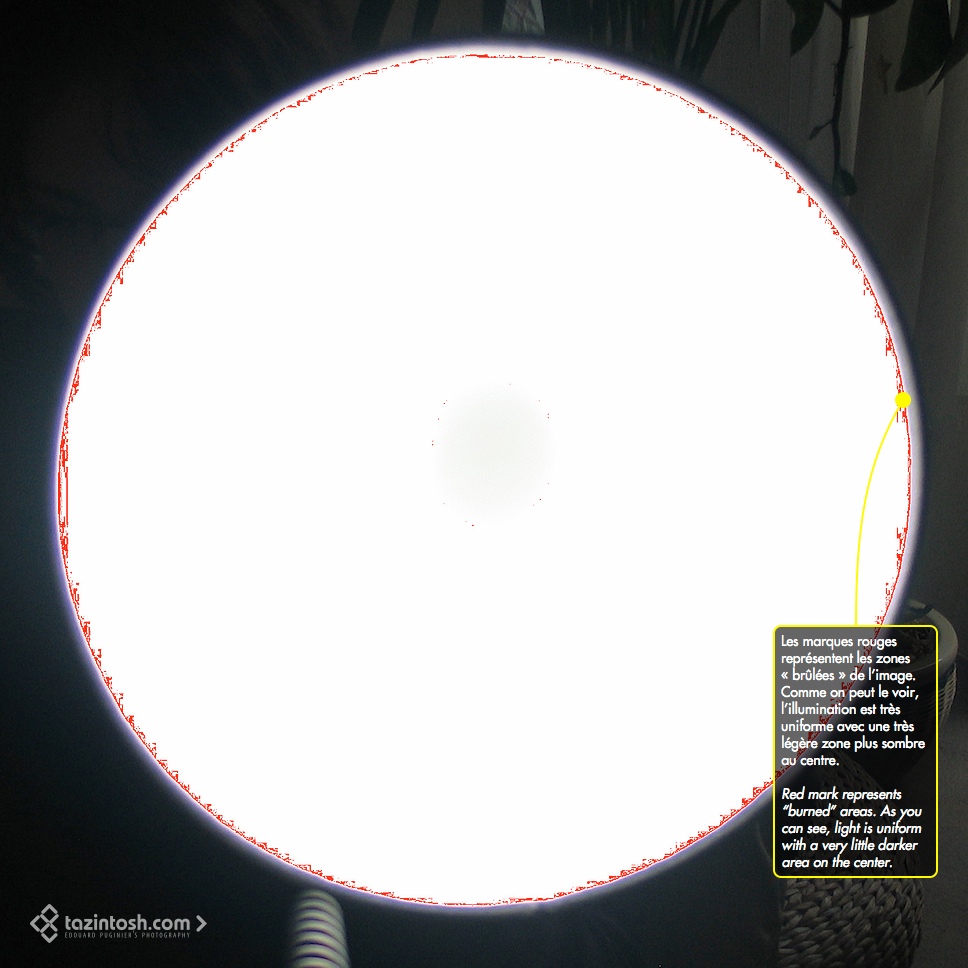
How it behaves?
Comparison with / wihout diffuse
Diffuser and flash firing
Test conditions
The following tests are really basics and their only aim is to get an idea about the power output efficiency of the duo flash + diffuser with very low apertures (high ƒ value) — also asked by John Hallmén. Also, those tests are probably not exhaustive but give an idea. Moreover, you'll be able to judge on the diffuse aspect.
Gear:
- Body: Canon 5D Mark II;
- Lens: Canon EF 180mm ƒ/3.5L Macro USM;
- Flash: Canon Speedlite 580EX II;
- Diffuser: homemade.
Lighting:
- An almost enterely dark room (flash will more likely give his higher power ouput);
- A simple white surface, almost opposed to the flash position, to get a bounce light.
Pictures:
- All taken in RAW;
- Exposures with bare flash at ƒ16,
and flash + diffuser at ƒ16 and ƒ32; - Shutter speed willingly leave at 1/60e for all shots;
- Shots have not been post-processed (color, luminosity, levels, etc.);
- Only some sharpen applied after resizing for uploading here;
- Pictos on pictures are Apple property.
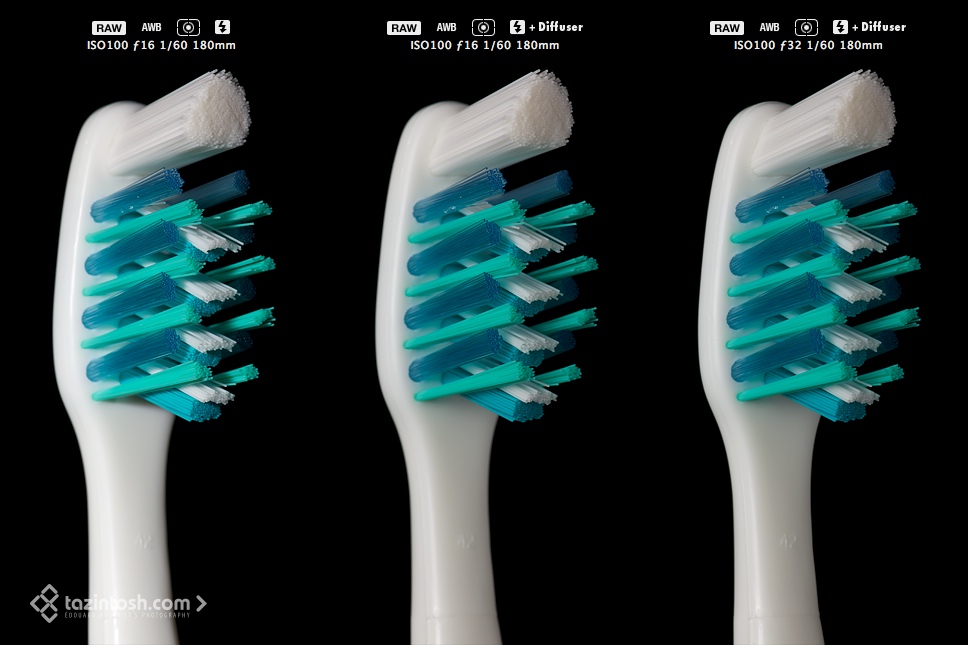
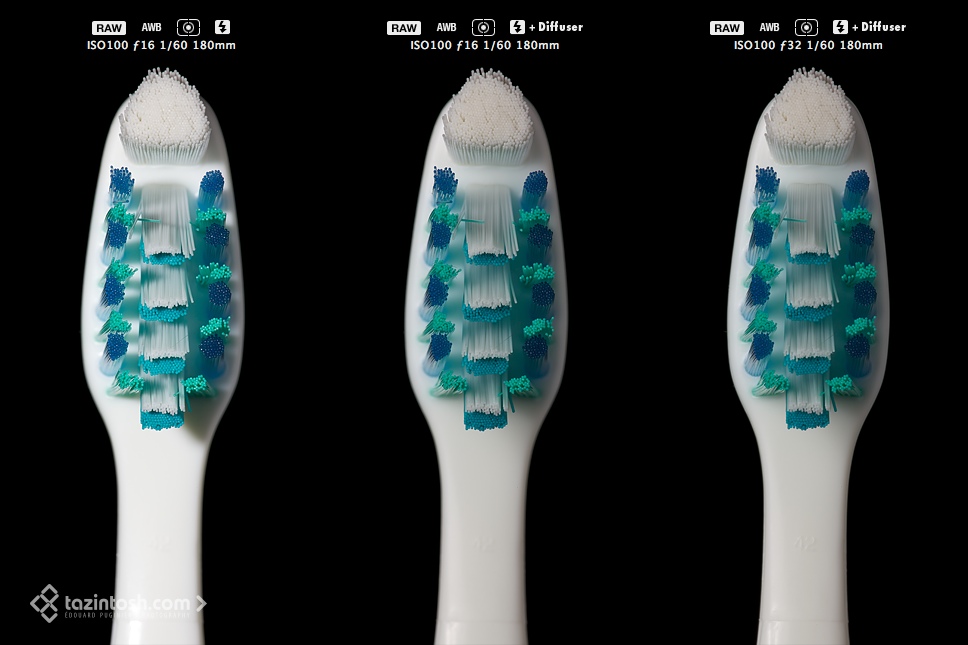
Toothbrush case
Toothbrush 3/4
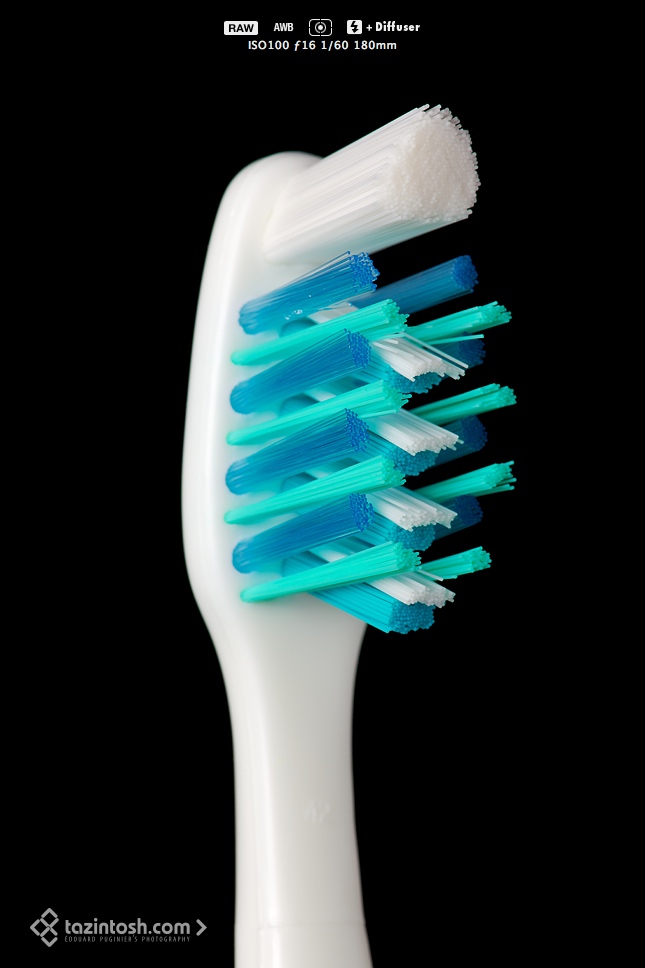
Toothbrush front
Toothbrush profile

The thing we can immediately note is the diffuser role. Light is way softer, the result is less contrasted. I like the fact that no area is over-exposed, burned out, when taken with flash + diffuser. Even if without post-processing, this pictures are a little under-exposed (with those settings) compared to bare flash shots, they offer an higher flexibility in many aspects for post-processing. For such a subject, flash + diffuser has no problem exposing picture, even at ƒ32.
After post-processing comparison
Paintbrush case
Paintbrush
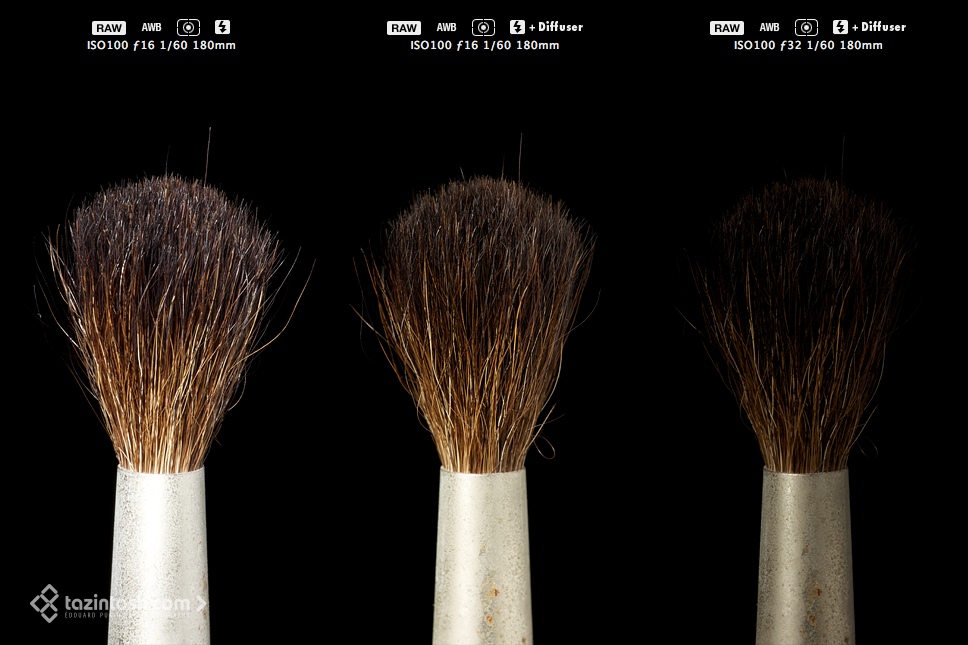
Here, with a dark subject + metal, firing bare flash (without particular settings) cause over-exposed result. Flash + diffuser at ƒ16 works great but the flash shows his own power output limits at ƒ32. However, bare flash at ƒ32 works.
Cow case
Cows
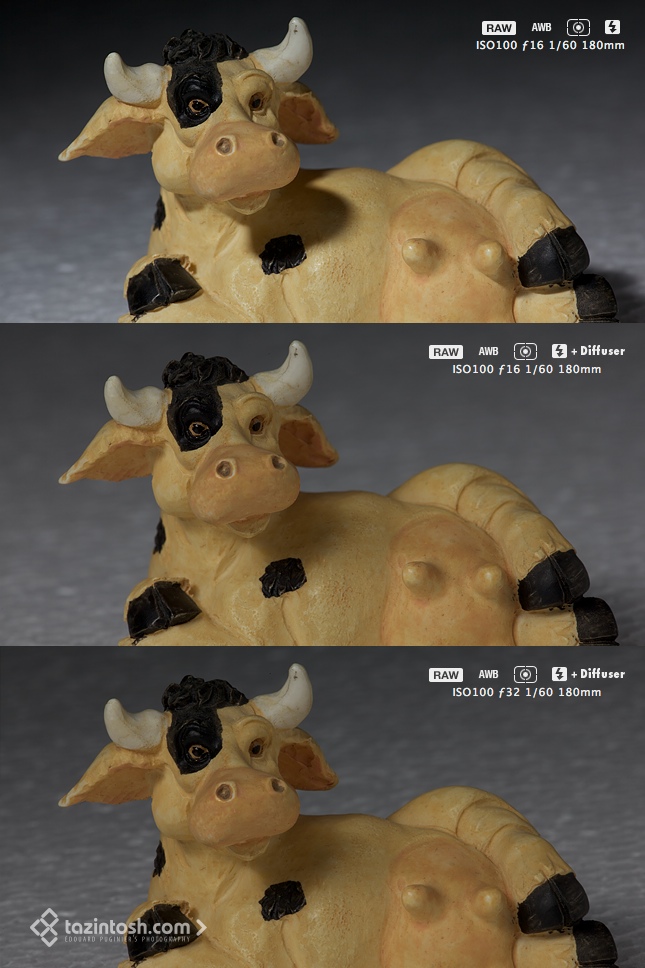
For this last example, I choose to take some distance from "macro" stuffs and try with a bigger object (7 or 8 cm long). Diffuser efficiency is as clear as the toothbrush essay. Shadow cast of the head on the body is really attenuated but still present (great to give volume feeling). About the flash + diffuser result, it's still efficient at ƒ32. Same remark as previously about the little under-exposed result, easily recoverable. Please note (once again) the tests was occuring inside a very dark room.
I hope I'll have some more time to continue my tests, anyway, I found results satisfying and it was a fun diffuser to build.
This symbolic coffee would be a true expression of your appreciation of this work.